Shorten Sleeves
Check out the step-by-step instructions to learn how to pin your item for the Shorten Sleeves alteration.
01

01
Before You Get Started
For this alteration, you’ll need the one Shorten Sleeves safety pin from your Ship Kit.
If you don’t have a Ship Kit yet, head to our Shop page to get started. Once you complete your order, we’ll send your complimentary Ship Kit.
02
03
02
Determine your new sleeve length.
Choose either Option A or B below to find your perfect sleeve length.
A Put on the item you are altering.
While standing up straight in front of a mirror, fold your item's sleeve up and inward to see how different lengths look. Continue testing lengths until you’re satisfied.
Once you've decided the length, hold the spot with your finger as you release the folded fabric, then grab the Shorten Sleeves safety pin from your Ship Kit.

If your sleeves are too tight or you're shortening long sleeves, you might not be able to fold them inward to preview your desired length. Instead, Option B might be easier—choose your sleeve length based on a similar item you own.
B Use an item you own as a guide.
Look through your closet for items with sleeve lengths you like and pick one you'd like to copy.
Once you've picked your reference item, lay the item you’re altering on a flat surface, then place the reference piece on top.

Align the shoulders of both items before deciding your new sleeve length.
04

03
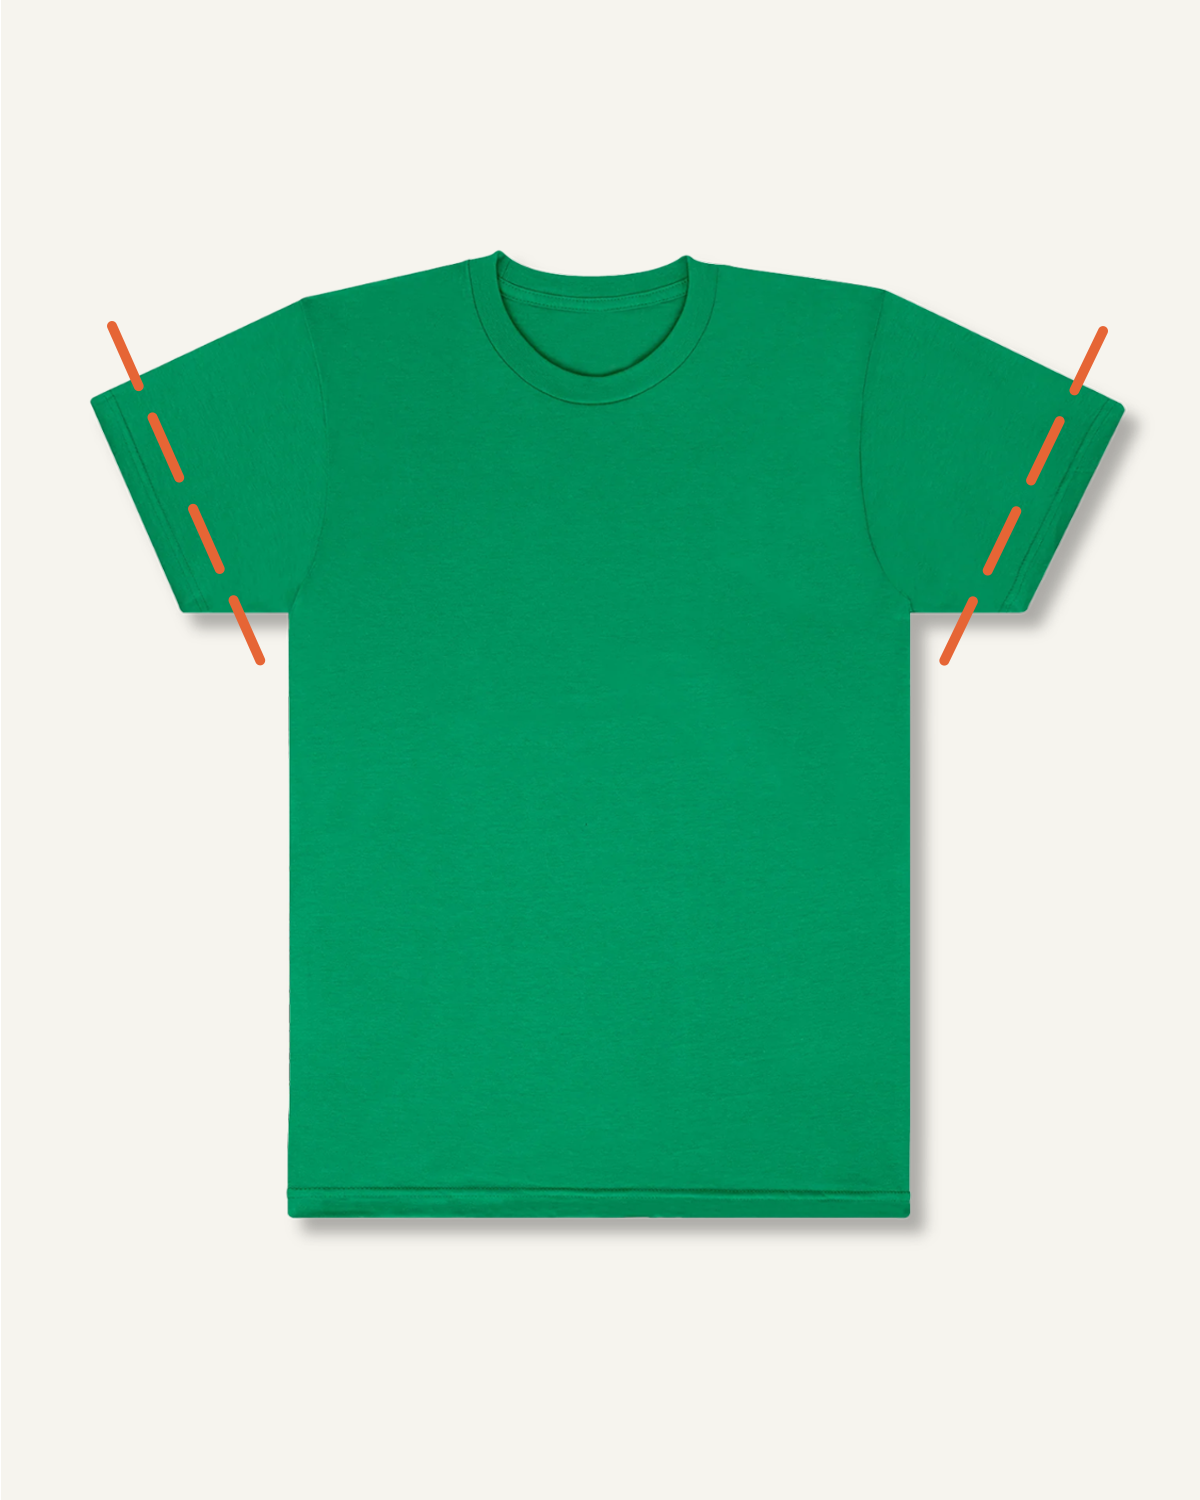
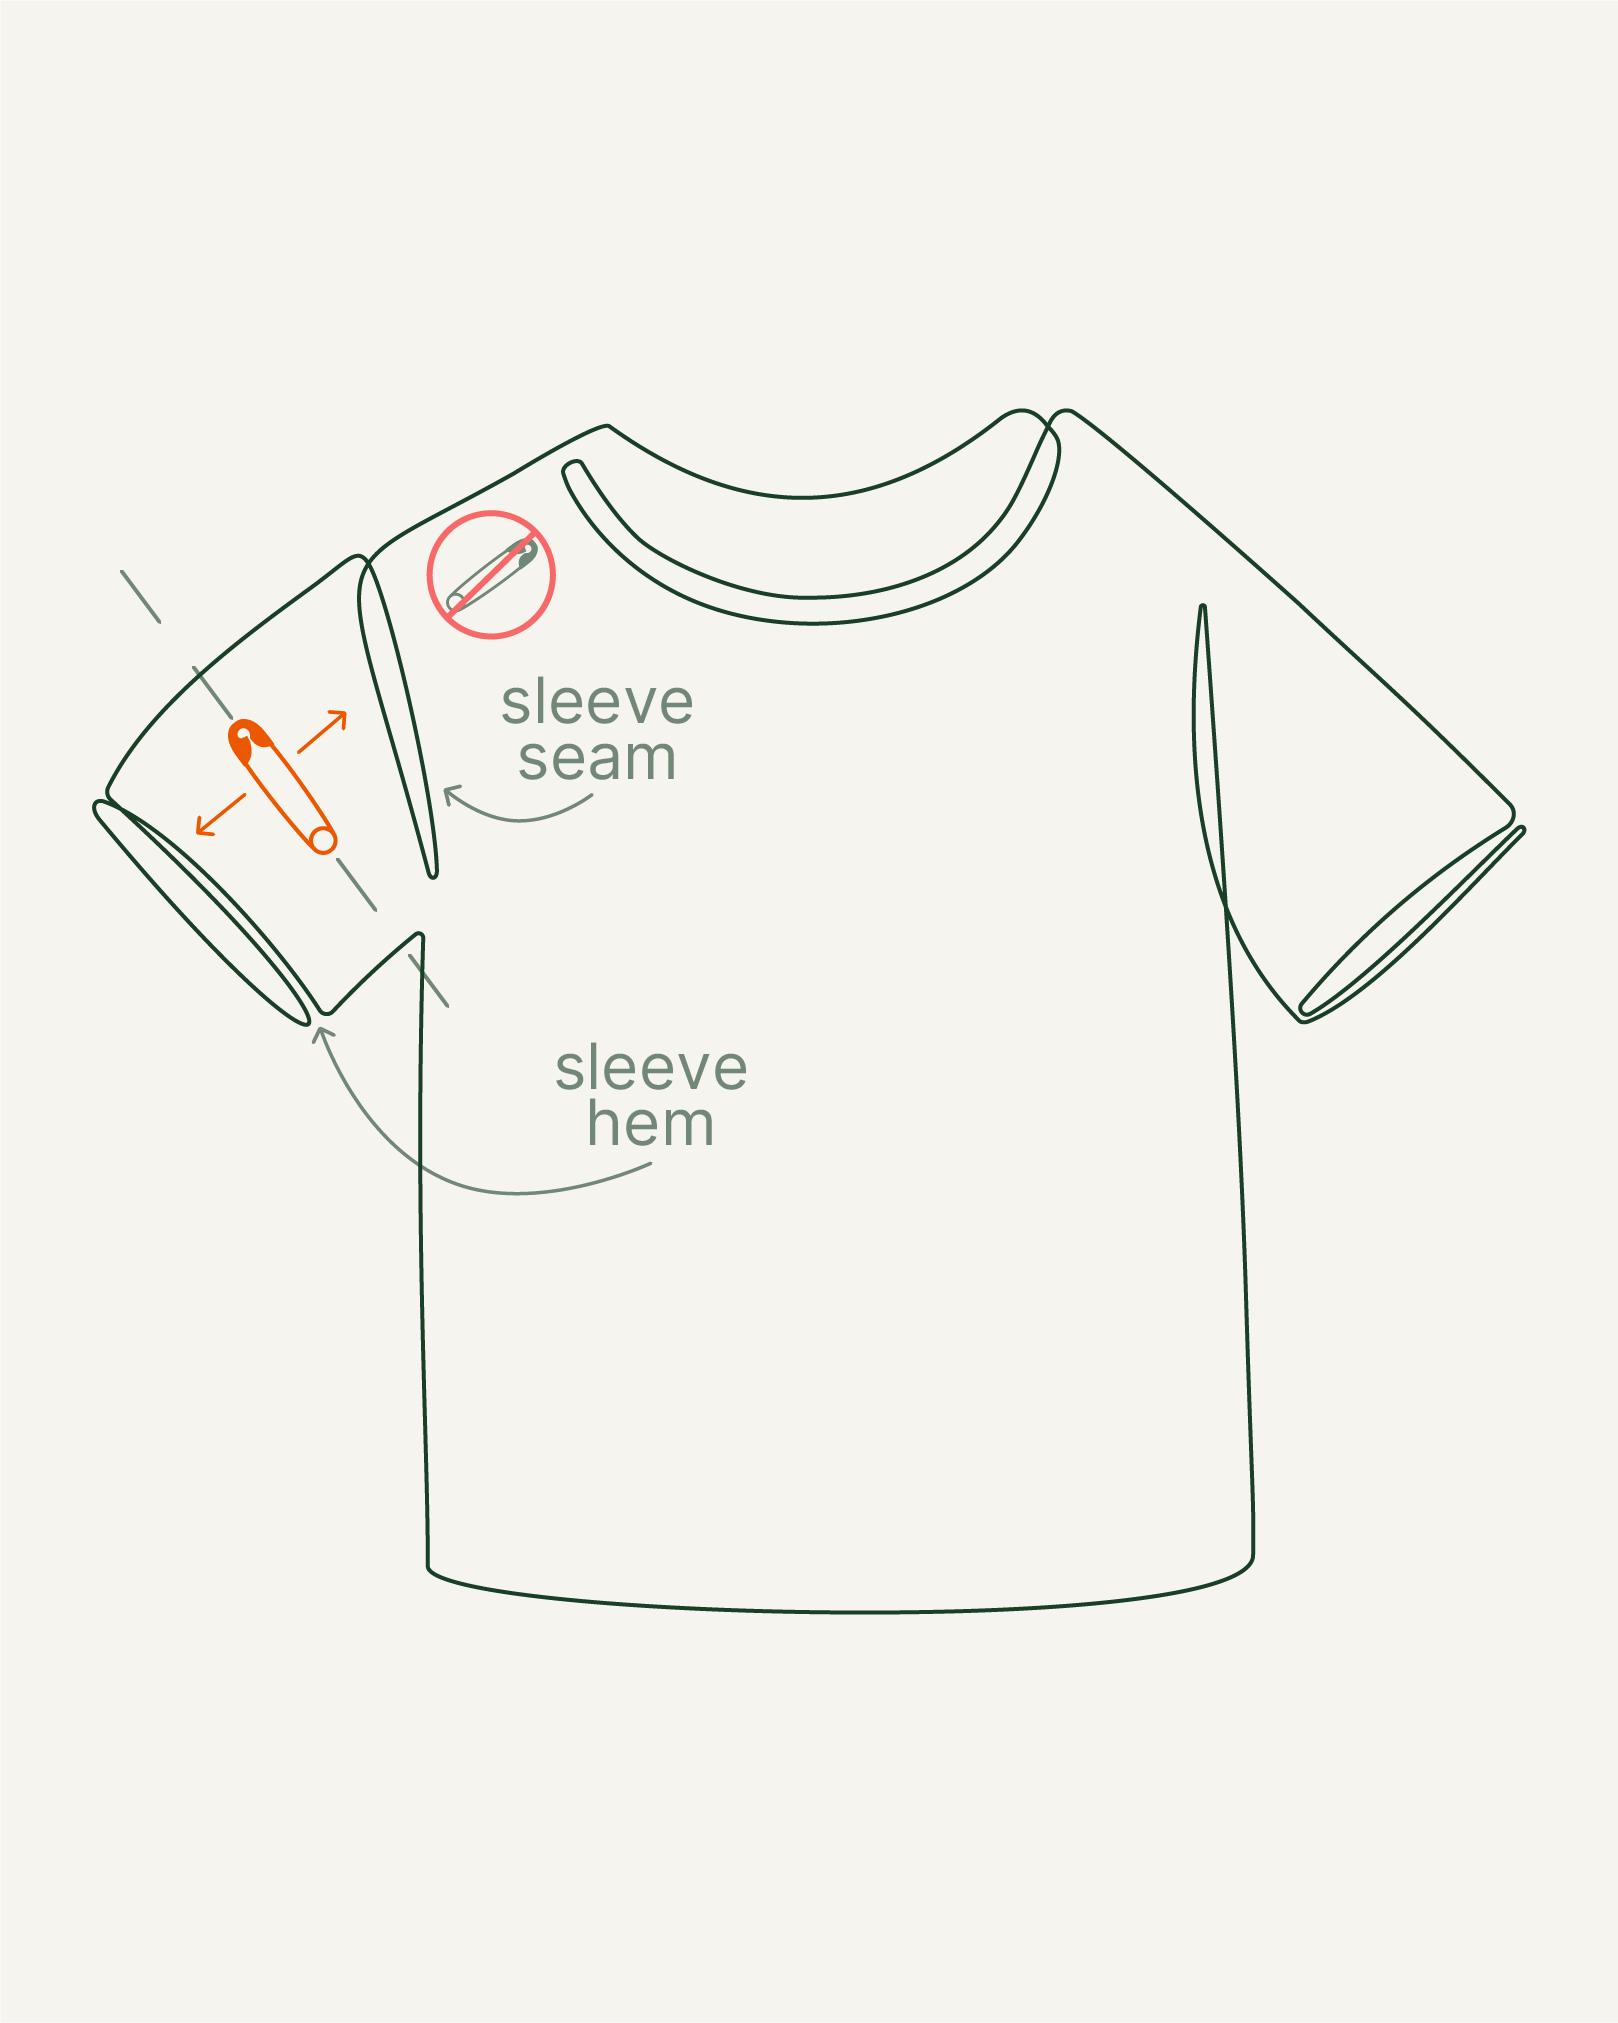
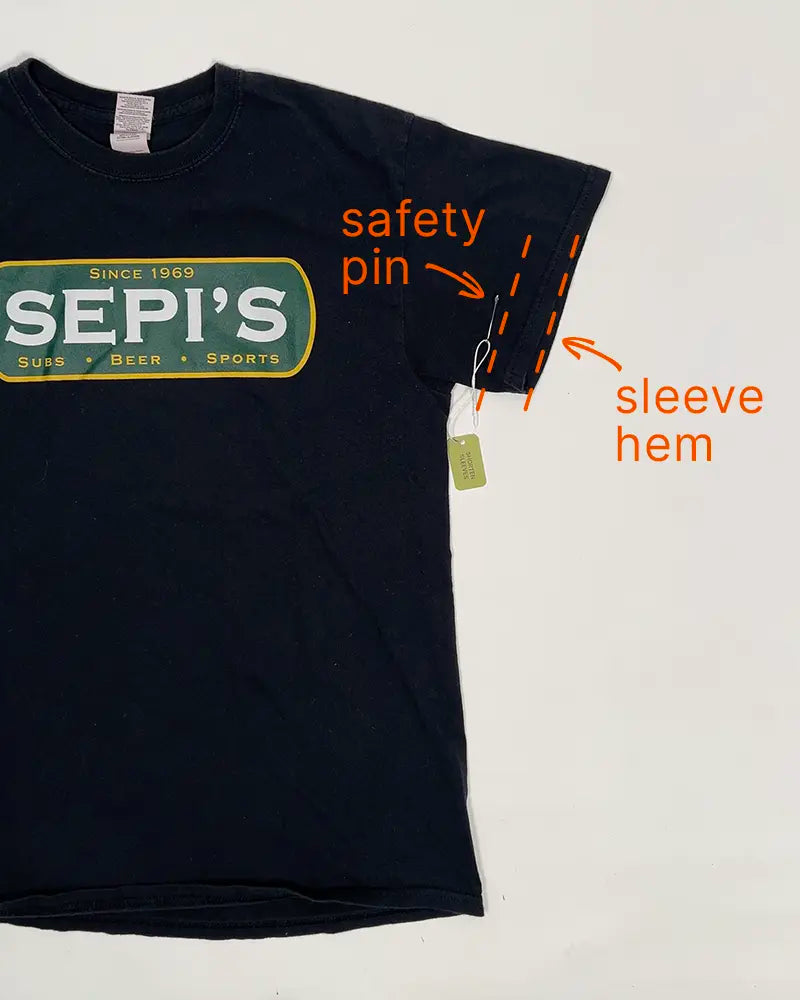
Mark your desired sleeve length with the Shorten Sleeves safety pin.
Place the safety pin parallel to your existing sleeve hem at the length you decided in the previous step. The safety pin should be placed somewhere between the sleeve hem and the sleeve seam.
You only need to pin one sleeve of your item. We’ll make sure your sleeves are evenly hemmed.

The safety pin only needs to pierce one layer of fabric to mark the new length. It does not need to hold any folds in place.
05

04
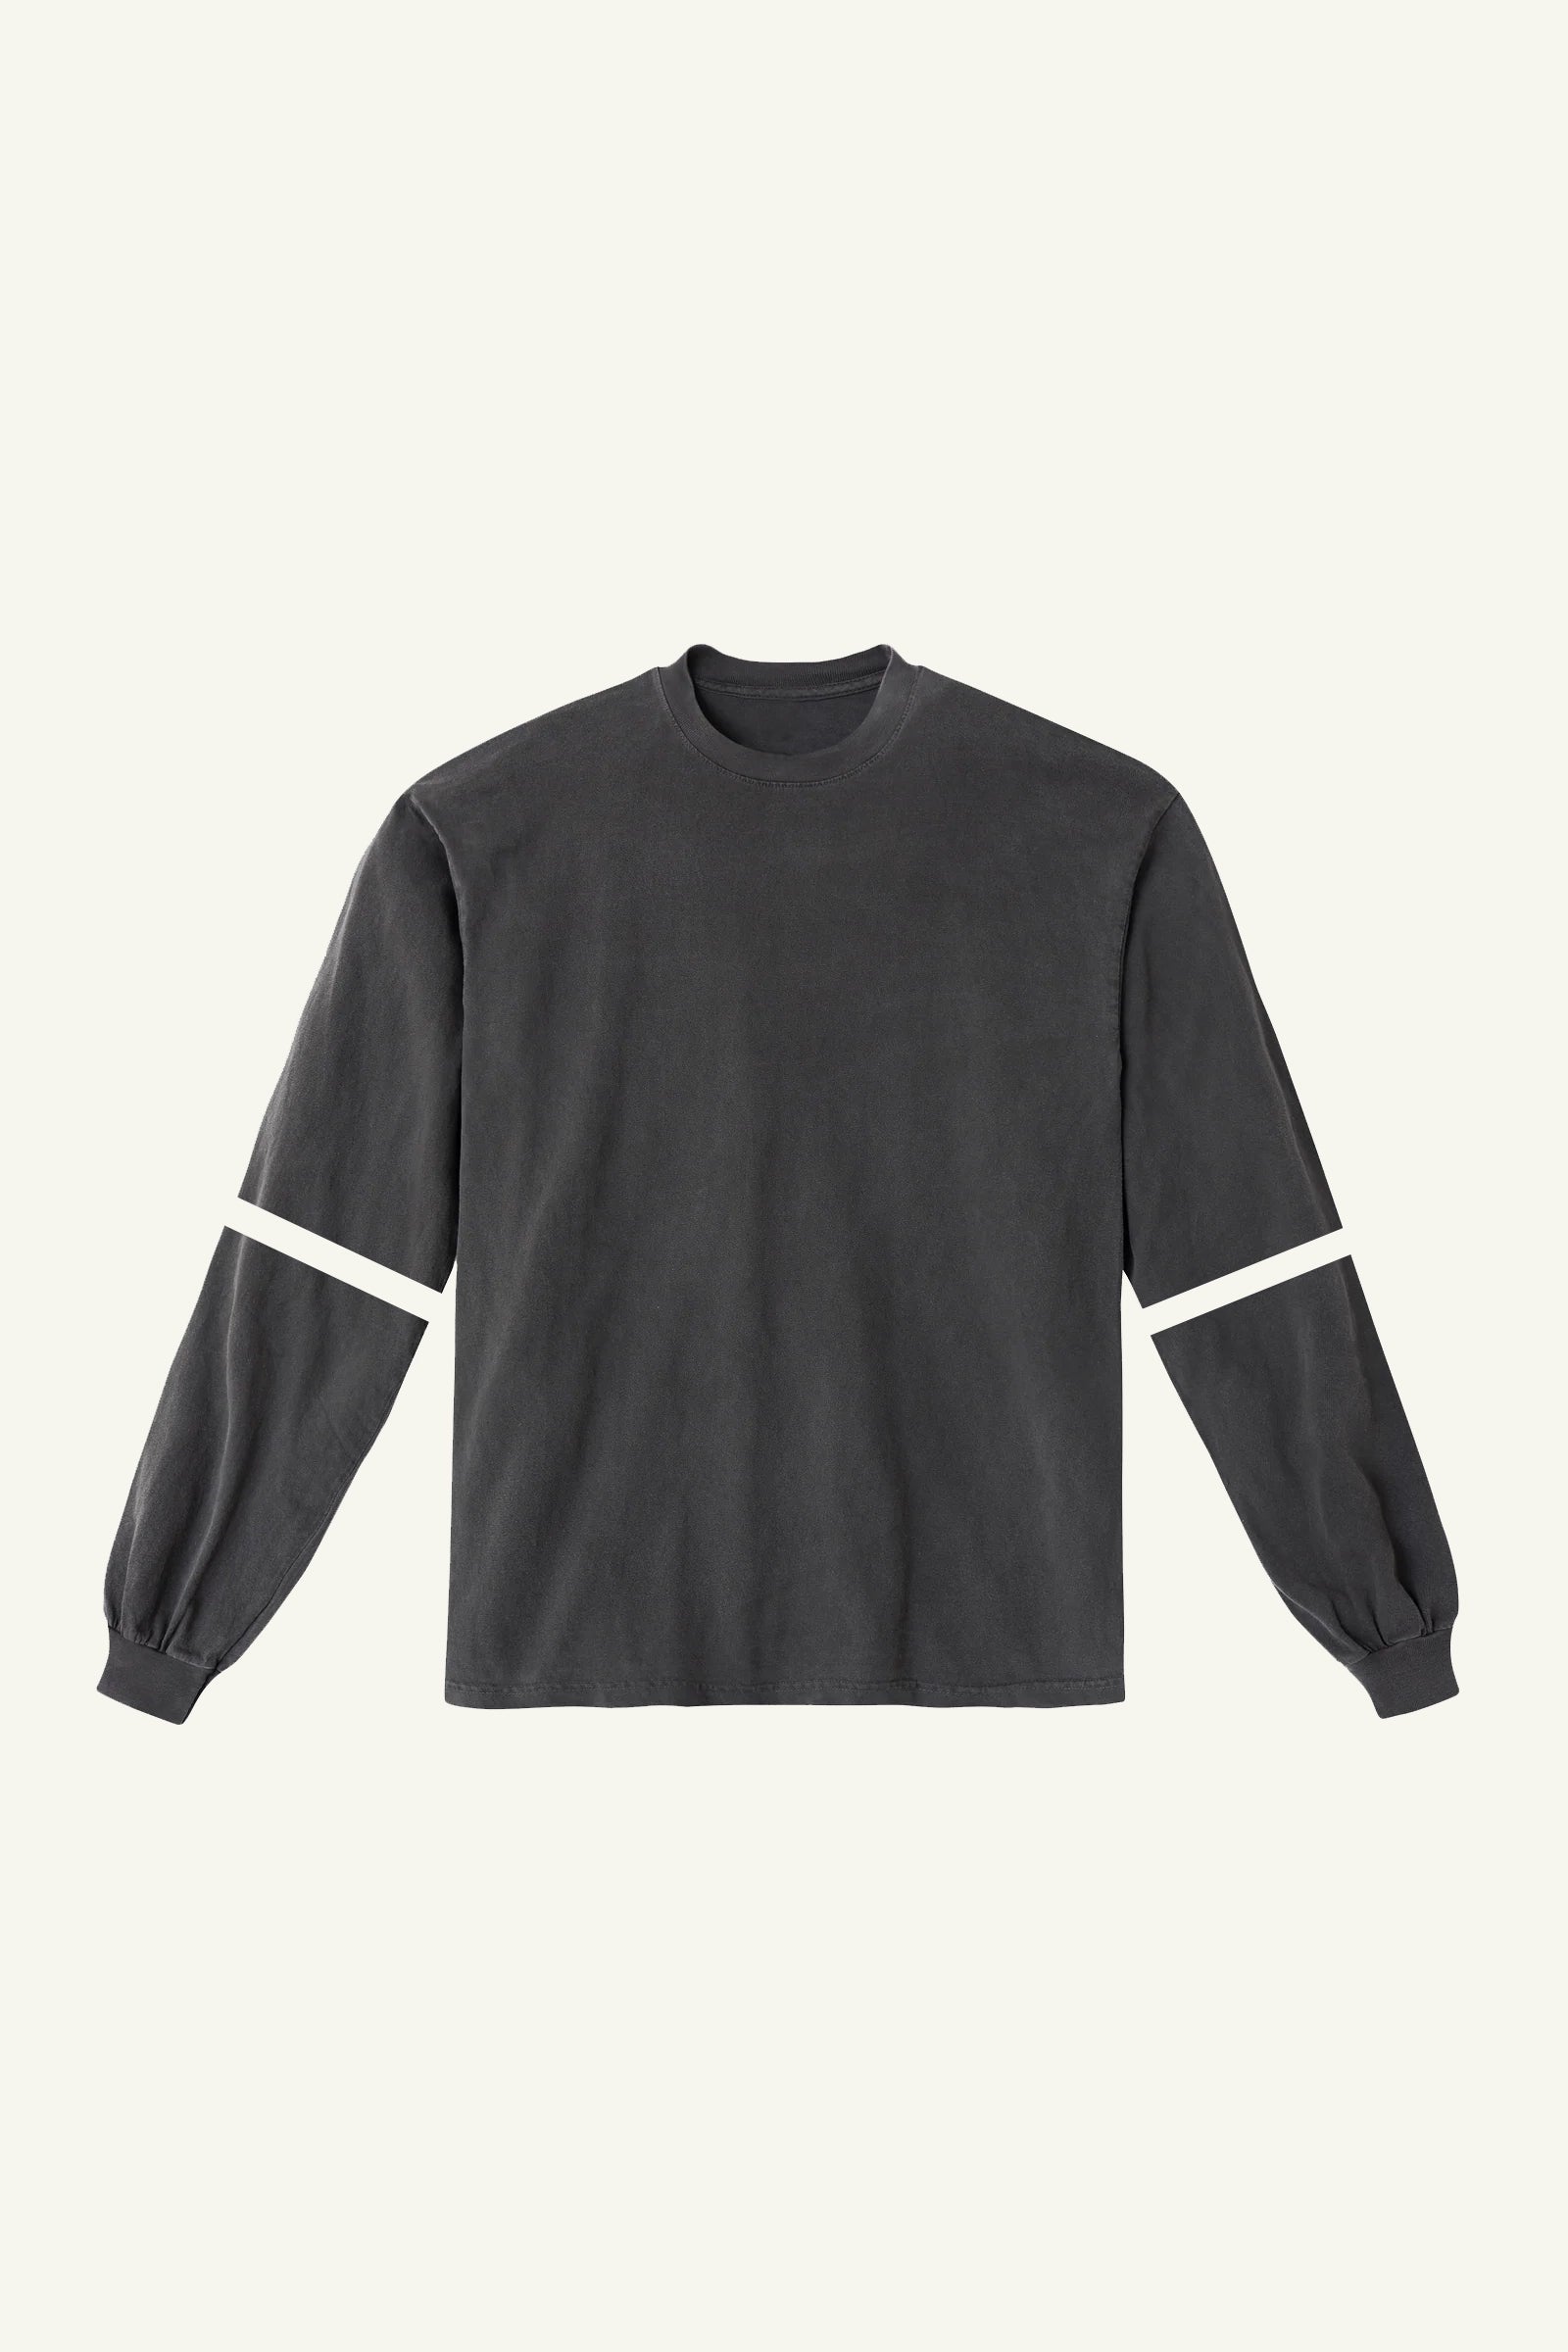
Test the length you pinned.
After placing the Shorten Sleeves safety pin, fold the hem of your sleeve up and inward at the pinned length to double-check your choice.Â
Adjust and repin if needed.

Make sure the safety pin is parallel to the sleeve hem.
06

If you purchased additional customizations for this item, refer to the next Pinning Guide. Otherwise, continue with this step.
07

If you purchased additional customizations for this item, refer to the next Pinning Guide. Otherwise, continue with this step.
05
Prepare the pinned item for shipping.
If wearing the item, carefully take it off, ensuring all safety pins stay in place.
Put your item and its Instruction Card into your Ship Kit Return Bag.
After using all Instruction Cards, seal your Ship Kit Return Bag, attach the prepaid shipping label, and drop it off at any USPS location.


